Woodland Adventure Nursery Decor
If you’re like me, you love everything nature and hope that your little one will too! A little bit of background; I followed my husband who was in the Navy to Washington state where I went to college for Environmental Science.
We moved back to the east coast closer to family once I graduated but the natural beauty and experiences I had while living there will always be special to me. I wanted to bring that into my baby boys nursery hoping he would share the same passion for nature as I do.
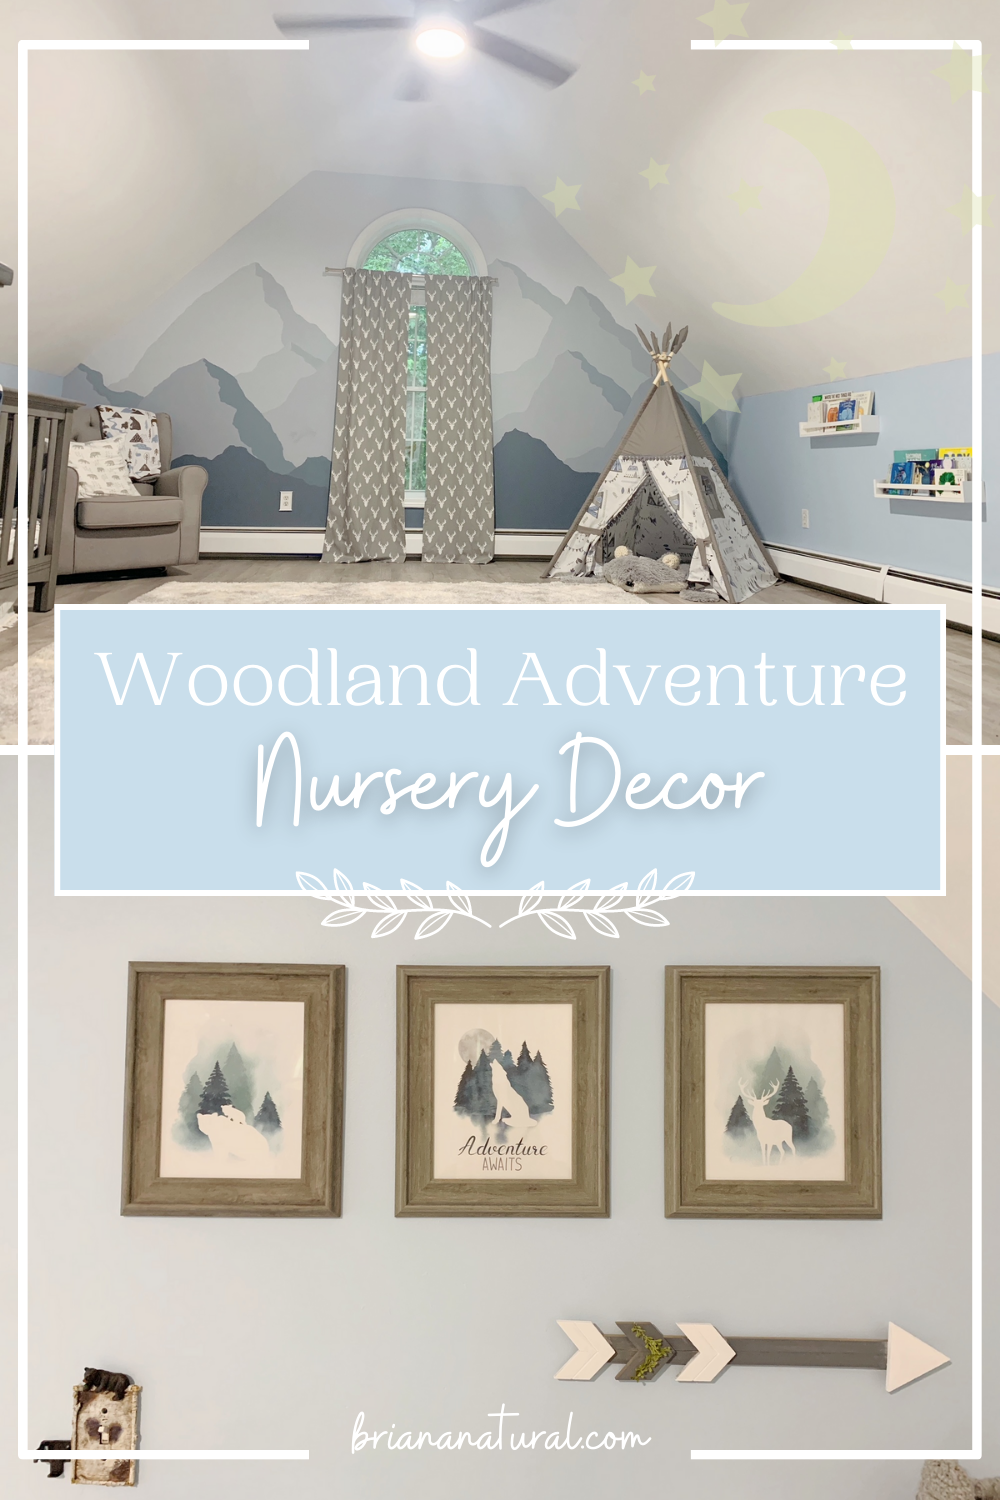
The perfect way to incorporate nature into the nursery would be to paint a wall mural of what I missed the most about Washington – the Olympic mountains!
Now I know learning how to paint a nursery mountain mural sounds intimidating but hear me out. The goal is to make it child friendly and I figured making the mountains cartoonish rather than realistic would work best. Cartoonish murals are WAY easier to do than something realistic!
Nursery Flooring
Step one was to replace the flooring. Prior to getting pregnant, this room was practically empty. We had a pipe burst which destroyed the carpet, so we really needed to start from scratch.
I figured a pale gray hardwood with a fluffy off-white carpet that could easily be replaced if needed would work best. Once this was done, I was onto the job of painting.
Choosing the Mountain Mural Colors
I painted 3 of the 4 walls “Tidal Blue”. The wall I was going to paint my mural on I used a very pale gray color for the background. As for the colors of the mountains, I started with darker mountains up front with each layer lighter than the previous.
I purchased 1 gallon of white eggshell paint and 4 different colors for the mountains, 1 quart each. I chose the colors to be dark gray, blue and teal shades while using the white paint to lighten each color as I painted each layer of mountains.
Make sure to keep the leftovers of each color for touchups as needed in the future! I used small glass jars to store them.
Remember – you can use any color family you want. I just chose blue because that was my color palette for my sons room. You can keep neutral and do tones of gray, or make it girly with tons of sunset pink!
How to Paint the Mountain Mural
Now for the technique! First, I taped off the sides of the walls. I then used a small paintbrush to paint the outline of the first layer and a small roller to fill it in. This can be easily free handed.
To draw the mountains, sketch jagged lines in the shape of a mountain with a pencil. Draw a jagged line going diagonally downwards from the mountain peak to be used for shading.
To make it simple, envision the silhouette of a mountain range which resembles a jagged curved line straight across. The first 3 layers I painted were 3 tones of dark gray only but as I painted the large mountains, I used 2 shades each.
Each mountain would have one lighter and one darker color to give dimension. The goal was to use the darker color to imitate shadows towards the back of the mountain. You can tape off each layer for the mountains, but it is such a time saver to freehand it. That’s all for painting!
Decor and Design
When the painting was finished, I moved on to décor. I purchased this beautiful teepee from Etsy that matched all the colors of the nursey. A wolf rug, also from Etsy, was purchased to go inside the teepee. From Amazon I purchased 2 white floating bookshelves that had a modern, clean look. The goal for this was to create a cozy reading corner.
In the next corner, I set up my rocking chair. This Delta Children gray tufted nursery chair from Target was very affordable and so far has held up very well! I styled it with a woodland themed baby blanket I received as a gift and a bear pillow I purchased from.. you guessed it.. Etsy again.
Woodland Adventure Wall Art
Next, I set up the changing table wall. I purchased 3 woodland based nursery prints from Etsy that tied together the blue and gray colors of the room.
The gray frames I purchased from Michaels matched the baby furniture perfectly. I decided to up the game with some arrows I created myself. I purchased them unfinished from Hobby Lobby and stained them gray. I then painted the tip and ends white and hot glued some fake shrub trimmings onto the ends.
I wanted something with my sons name to add to the character of the room. After hours of browsing, I settled on a laser cut wood design of my sons name within antlers that I got from Etsy. I also had a custom baby blanket made for him with his name that had some woodland animals to really bring the room together.
Last but not least, the finishing touch. Of COURSE I needed to give my sons night time routine that extra pop of nature. I went with a light projector from Amazon of the Northern Lights.
And there you have it! Designing a woodland or adventure themed nursery provides an enchanting and calming environment for your baby to thrive in.
By incorporating natural elements, whimsical decors, and a soothing color palette, you can create a space that inspires a love for nature and sparks your child’s imagination. As you embark on this joyful journey, remember that the most important aspect is creating a nurturing and loving environment where your little one can grow surrounded by the beauty of nature!
Note: This post may contain affiliate links. I hope you love these products as much as I do!


